In Monster Hunter Wilds, Mantles return as essential tools for hunters seeking to enhance their performance in hunts. These wearable items grant unique advantages—from invisibility to healing, damage boosts, and more. While each Mantle comes with its activation duration and cooldown period, they can be game-changers when used wisely. Below, we’ll break down every Mantle in Monster Hunter Wilds, how to unlock them, what they do, and how to use them.
Monster Hunter Wilds is available now on PS5, Xbox Series X|S, and PC (Steam). Players who are still waiting can immediately Buy Cheap Monster Hunter Wilds CD Keys at Z2U, equip your Mantle, sharpen your blade, and dive into the hunt.
What Are Mantles?
Mantles are special wearable tools that provide temporary buffs and effects. They’re unlocked progressively throughout the main story and can only be equipped or changed at a Base Camp or Pop-up Camp Tent. Except for the Ghillie Mantle, you can only equip one Mantle at a time via the "Change Equipment" menu. Choose wisely based on the quest and your target monster.
Ghillie Mantle
How to Unlock: Complete Chapters 1-2
Duration: 120 seconds (or until you attack or are attacked)
Recharge Time: 300 seconds

As your first Mantle in the game, the Ghillie Mantle provides complete invisibility from monsters. Perfect for setting traps, sneaking up on endemic life, or escaping dangerous encounters. Its timer freezes if you remain completely still, especially in tall grass—allowing for prolonged stealthy gameplay.
Tip: Use this mantle to capture wildlife or approach rare monsters without initiating combat.
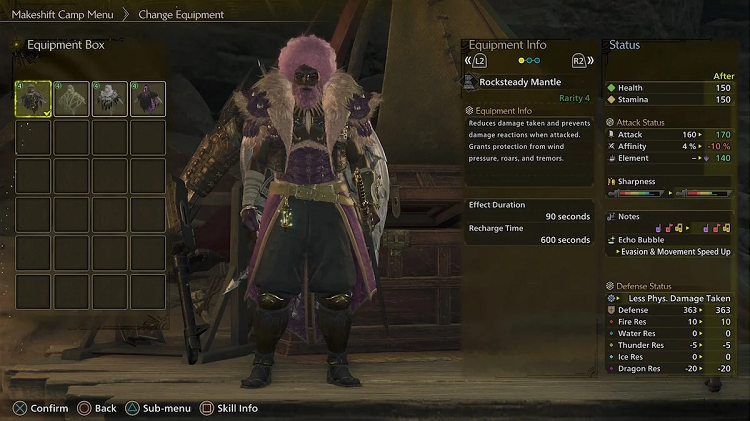
Rocksteady Mantle
How to Unlock: Talk to Gemma after Chapters 2-4
Duration: 90 seconds
Recharge Time: 600 seconds
The Rocksteady Mantle reduces damage and makes you immune to knockbacks, roars, wind pressure, and tremors. While it’s incredibly useful early on, its effectiveness tapers off in late-game content where armor sets and decorations can offer similar effects with more uptime.
Use Case: Ideal for heavy weapon users or when fighting monsters with frequent roar or wind mechanics.
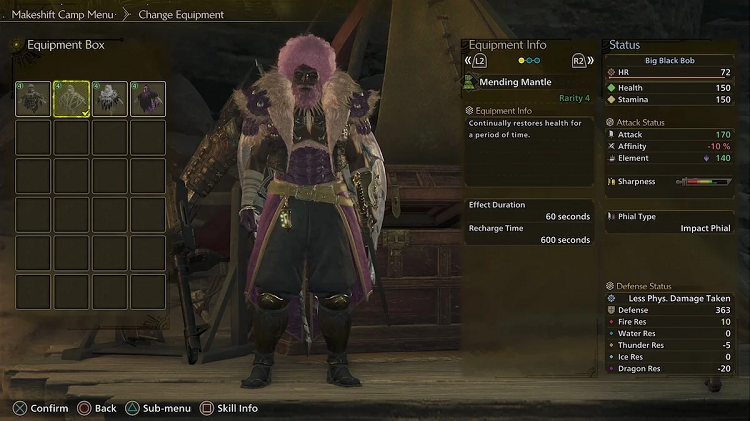
Mending Mantle
How to Unlock: Talk to Gemma after Chapters 3-3
Duration: 60 seconds
Recharge Time: 600 seconds

This Mantle provides passive healing over time. Though helpful in a pinch, most hunters may find other healing options—like Potions, Lifepowder, or Palico gadgets—more efficient due to their speed and flexibility.
Use Case: Best used during downtime in long fights or in multiplayer when you're conserving resources.
Evasion Mantle
How to Unlock: Talk to Gemma after Chapters 4-3
Duration: 90 seconds
Recharge Time: 600 seconds
The Evasion Mantle increases your dodge window and enhances your damage, unlocking new combos for specific weapons. It’s especially effective for agile weapon types like Bow, Dual Blades, or Insect Glaive.
Tip: Equip this for fast-paced hunts where dodging and counterattacking are crucial. Try combining it with critical or elemental builds for high DPS.
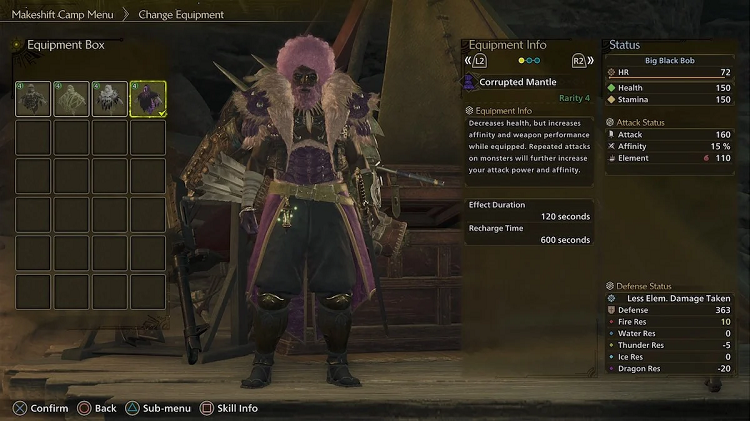
Corrupted Mantle
How to Unlock: Talk to Gemma after Chapter 5-2
Duration: 120 seconds
Recharge Time: 600 seconds

A high-risk, high-reward Mantle that gradually drains your health while greatly increasing your Affinity and weapon damage. The bonuses scale with successful attacks, pushing players to stay aggressive and land consistent hits.
Warning: Bring plenty of healing items or wear armor with health regeneration effects to mitigate the drawback.
How to Equip and Change Mantles
You can equip a Mantle by visiting any Tent at a Base Camp or Pop-up Camp. Select “Change Equipment” from the Equipment Menu, and scroll to the bottom to access your Mantle slot. You can only bring one Mantle at a time (aside from the permanent Ghillie Mantle slot), so choose based on the monster you're facing and your play style.
As with many popular games, many player marketplaces support free trade, such as Z2U.COM. They can Buy Monster Hunter Wilds Accounts here. These accounts often include pre-unlocked gear, high-rank progress, or specific weapons and Mantles.

Conclusion
Mastering Mantles in Monster Hunter Wilds can significantly enhance your hunting strategy. Whether you prefer stealth, defense, healing, agility, or pure damage, there’s a Mantle that fits your style. Just remember to plan around each Mantle’s duration and cooldown, and you'll gain a serious edge on the battlefield.


