In STALKER 2: Heart of Chornobyl, players venture into the perilous Zone, facing off against hostile factions, mutants, and deadly anomalies. The game is filled with tough choices, side missions, and complex objectives that test your survival skills. One of the key early-game quests is the Hornet’s Nest, where players must navigate through dangerous areas, make impactful decisions, and deal with challenging combat scenarios.

Getting Prepared: Weapons and Gear
Before diving into the Hornet’s Nest mission, ensuring you have powerful and reliable weapons is crucial. The Zone is full of dangers, and you’ll need solid firepower to defend yourself. For the early stages, picking up the best guns available—especially from loot crates like the Journalist’s Stash on the roof—can give you a significant advantage. Additionally, keeping your gear upgraded and well-maintained is vital, and you can choose to Buy STALKER 2: Heart of Chornobyl Account to obtain more good equipment to easily deal with powerful enemies and anomalies.
Players may also encounter tricky side objectives early on, such as dealing with the Bulba Dog Collar near the imploding anomaly, or helping Nightingale with specific tasks. Keep an eye out for these side activities as they can provide useful items and information. However, be mindful that not all missions are straightforward, and some may require lateral thinking or careful exploration.
The Hornet's Nest Mission
The Hornet’s Nest is a mission that becomes available after completing the Just Like the Good Old Days quest. To begin, you’ll need to travel to the marked facility on your map, a large spherical building with a heavy enemy presence. As you approach the site, be ready for intense combat. The facility is surrounded by hostile forces, so it’s best to enter cautiously.
Navigating the Facility
Once you reach the building, enter from the west side where there’s an opening in the wall. Be sure to use cover as you move forward, as enemies will be waiting for you in key locations. The path to the objective marker will be filled with both human and mutant threats, so constant vigilance is necessary.
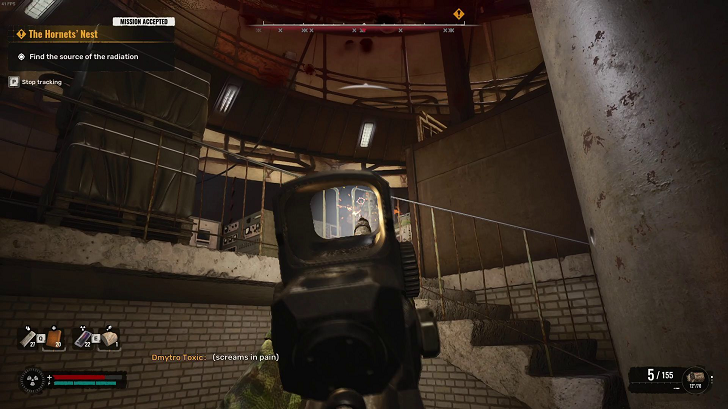
Inside the building, head toward the stairs located near a burning tank on the east side. This area is a hotspot for enemy activity, and you’ll need to clear the area before proceeding. When you reach the top of the stairs, you’ll encounter Solder, an NPC who may be involved in optional objectives, depending on how you’ve progressed in the story up until this point.

Dealing with Solder and Optional Objectives
If Solder is alive, speaking with them will unlock a new objective marker for you to follow. This side objective involves disabling the Sphere’s generator, which will reduce the radiation in the final room of the mission. While you’re navigating through the facility, keep an eye out for additional staircases that lead up to the upper levels. These will eventually guide you to the radiation source.
Reaching the Final Objective
As you make your way through the building, remember to always head up any staircases you come across. The more you ascend, the closer you’ll get to your goal. Ultimately, you’ll find yourself in the final room, where the radiation is at its peak. To complete the mission, you must shut down the Sphere’s generator. This step is optional but highly recommended, as it will make your next steps significantly easier.
After disabling the generator, continue through the corridors toward the marked location. Along the way, you’ll face more enemies, but your priority should be making it to the radiation source. Once you’ve secured the Emitter, the final part of the mission is to exit the building and return to safety.
Important Choices and Consequences
As with many STALKER 2 missions, Hornet’s Nest presents players with choices that can influence the course of events. You’ll encounter various NPCs and factions vying for control in the Zone, and the decisions you make will have lasting consequences. For example, when tasked with retrieving sensors from Squint, you’ll need to decide whether to help or kill Squint. This decision impacts how the mission progresses, especially when deciding who to give the sensors to—either Richter or Zotov.
Additionally, if you’ve undertaken the Lost Boys side mission, you’ll face another crucial decision involving the Ninth or Dew factions. Your choices will shape your interactions with the various characters and factions in the game, unlock new facilities, and customize the fate of key NPCs by picking up Cheap STALKER 2: Heart of Chornobyl Account at Z2U, where every action you take will make playthrough unique.

Combat and Strategy
The Hornet’s Nest mission can be particularly difficult due to the high number of enemies in the area. To ensure your success, stock up on plenty of ammunition, healing items, and any powerful weapons you can find. Don’t forget to repair and upgrade your gear to keep it functioning at peak performance. The Zone is a brutal place, and the better prepared you are, the higher your chances of surviving and completing your objectives.
Conclusion
STALKER 2: Heart of Chornobyl is a game filled with complex missions, tough choices, and intense combat. The Hornet’s Nest mission is a prime example of this, offering players a challenging but rewarding experience as they navigate dangerous environments, confront hostile enemies, and make decisions that affect the outcome of their journey through the Zone. Whether you’re dealing with the radiation-filled facility or deciding the fate of key NPCs, every action you take will shape the story as you move forward.


